It’s always wise to get your heating circuit checked before the winter season is upon us. You don’t want to have a leaky radiator and make an avoidable mess when the heating system is full throttle during the coldest nights.
Once you identify the culprit, you only need to isolate it from the circuit. You can always call your trusty plumber to get the job done, but if you decide to embark on this DIY project, you’ll be surprised by how easy the process is.
Buckle up as we walk you through our step-by-step guide on how to isolate a radiator. Spoiler alert! It’s a straightforward process, and you’ll be up for the task!
Contents
Key Takeaways
- If you encounter issues with a radiator, isolating it from the heating circuit can prevent leaks and improve efficiency, whether due to a leaky valve, gunk buildup, home redecoration, or disuse in certain rooms.
- To isolate a radiator, you’ll need tools like screwdrivers, pliers, spanners, and other materials like overalls, a bucket, and towels to handle potential leaks.
- The process involves turning off the radiator’s valves, removing isolation valves, sealing inlets, lifting the radiator off the wall, and reinstalling it while ensuring proper water levels in the heating circuit.
When Do You Need to Isolate a Radiator?
We’ve already touched on how a leaky valve will require isolating the whole radiator to get the valve replaced. But that’s not the only situation when you’ll want to remove your radiator from your home’s heating circuit.
For instance, if you’re getting an unexplainable hit to the heating intensity in a room, you might want to flush out your radiator. Gunk buildup can limit the efficiency of a radiator, and all you need to do is isolate the unit and clean the tubes.
Also, if you have a home redecoration in the plans, you might want to isolate and remove your radiators in advance. The wall back there deserves a fresh coat of paint, and you can’t leave such spots behind.
Finally, you’d be surprised by how much you can save on your energy bills if you isolate radiators in the rooms you no longer use. That’s not all; your entire heating system will operate more efficiently after the unwanted dead spaces are removed from the circuit.

What Tools Do You Need to Isolate a Radiator?
Better safe than sorry! Get all your handy tools ready before dipping your toes into this DIY project. You don’t need anything crazy here, as you probably have those tools and materials lying around somewhere.
Here’s a list of all the tools you’ll need:
- A set of screwdrivers
- Pliers
- Spanners
- Radiator inlet stoppers
- Overalls to prevent your clothes from getting wet
- A bucket to avoid getting your floor flooded by the leaky water
- A pair of extra towels will come in handy as well

How to Isolate and Remove a Radiator
Now that you’re all set up, it’s time to start! Remember that all your house’s radiators share the same circuit of circulating water. Any opening in the circuit will get your carpets soaked in no time, so make sure you’re following along as we walk you through our step-by-step guide!
Step One: Turn Off the Radiator
Upon inspecting your radiator’s exterior, you’ll notice one valve on each end right at the bottom. Depending on the type of valves that your radiator has, you might want to adopt different strategies.
If you spot turn valves, you’re in luck. All you need to do is turn the valves all the way in a clockwise direction, and voila, your radiator is now isolated from the circuit.
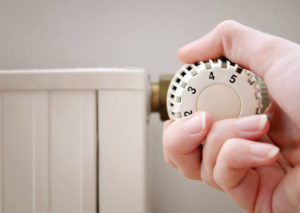
Some modern radiators come with thermostatic valves, which shouldn’t be much different from conventional turn valves. This time, you want to ensure the knob is sitting at the zero mark before proceeding.
On the other hand, your radiator might have lockshield valves instead, which require more effort. Such valves don’t turn around, as they come with a cap that needs to be removed. Once you do, use your plier to turn the head of the valve clockwise until it doesn’t give way anymore.
Step Two: Remove the Isolation Valves
Upon closing both valves, no more water can get into your radiator’s tubes. However, the water that’s already there doesn’t have a way to get out. That’s why you need to remove the isolation valve and start draining the murky water stuck inside.
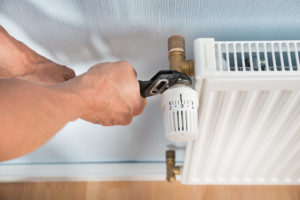
If this is the first you’ve tended to your radiator in years, the nuts that keep the valves in place might be all rusty and hard to manoeuvre. A correct-sized spanner should get the job done. You have to stay gentle, though, as any extra force can damage the fastening nuts and give you future leakage issues.
Get your bucket and towels ready to dry the water that spills out. After you’re done with the first valve, you need to repeat the same steps to get the second valve off.

Step Three: Seal the Inlets
No matter how hard you try to drain the water inside, you’d be surprised to find out that some resilient water will always remain inside the radiator’s body. For that, your best course of action is to take the radiator outside, put it to one side and watch the last drops of water come out.
Before pulling that off, ensure the inlets are tightly sealed. Search for the specific stoppers that come in your radiator’s box. If the stoppers are nowhere to be found, it’s not a deal breaker. All you need to do is keep a tight seal at the inlets by any means necessary!
Step Four: Lift the Radiator Off the Wall
For the most part, radiators are fixed to a wall by means of metal brackets. Lifting the radiator off the brackets might not be the perfect solo job, especially if you’re doing this for the first time. It won’t hurt to have a pair of extra hands helping you manoeuvre the radiator unit over the removed network of pipes.
Step Five: Reinstall Your Radiator
Once your mission is accomplished, follow the reverse steps to reinstall the radiator back in place. It’s worth noting that you need to add water to your heating circuit to compensate for the lost amount during the radiator isolation. Then, check the pressure readings and ensure you’re in the green zone.
Heat Pump Source: Reliable Heating and Cooling Solutions
At Heat Pump Source, we take pride in our unwavering commitment to serving the UK with top-tier HVAC solutions. From the efficiency of heat pumps and the cool relief of air conditioning to the warmth of boilers, radiators, and underfloor heating, our dedicated team is always at the forefront of innovation. We understand the unique needs of every household and business, and we strive to provide dependable health and cooling products and services that are tailored just for you. Ensuring your comfort and satisfaction is our utmost priority. Whether you have questions, need guidance, or require support, we’re always here to assist. Please don’t hesitate to contact us; we’re eager to be of service.
In Conclusion
Isolating a radiator is manageable if you come prepared and know exactly the ins and outs of your heating circuit. Now that you have a clear roadmap to follow, your next radiator maintenance round will be a breeze.
About the Author
At Heat Pump Source, our articles are the product of a collaborative effort among a team of highly skilled HVAC experts. Our dedicated professionals, hailing from diverse backgrounds in heating, ventilation, air conditioning, and refrigeration, contribute their extensive knowledge and experience to every piece of content. This multidisciplinary approach ensures comprehensive coverage. Our commitment is to deliver authoritative, reliable, and tailored advice to meet the unique needs of every household and business across the UK.

